MetaMask is probably the most popular non-custodial crypto wallet, with over 30 million users worldwide. The Consensys-based wallet rose to fame during the DeFi boom of 2020, especially with its growth tracking closely with the Ethereum ecosystem.
MetaMask offers several features, making it a go-to wallet for retail crypto investors and DeFi degens. This guide will provide detailed information on the history of MetaMask, how it works, its features, and how to get started with the wallet, even if you are a beginner.
Pros
- Non-custodial wallet, supports EVM-based networks
- Supports multiple accounts
- A central hub for DeFi and NFTs.
- 24/7 customer support (available here)
Cons
- Does not support Bitcoin or non-EVM compatible assets
- Security: Users can easily fall into scams if they miss-clicked on malicious transactions
What is MetaMask and How Does it Work?
MetaMask is a popular non-custodial mobile wallet and browser extension that serves as an Ethereum and Ethereum Virtual Machine (EVM) compatible wallet. The wallet offers users direct access to the EVM-compatible blockchain ecosystem, which hosts thousands of decentralized applications (dApps).
Once installed, MetaMask allows users to send, receive, and store crypto assets seamlessly. MetaMask only supports assets built on Ethereum and Ethereum-based protocols that use EVM and its programming language, Solidity. As such, the wallet cannot store crypto assets such as Bitcoin (BTC) and Solana (SOL), which operate on non-EVM blockchains.
MetaMask provides a gateway to the world of DeFi, as users can easily interact with decentralized exchanges (DEXs), gaming platforms, NFT marketplaces, and many other dApps. The wallet is compatible with the most popular browsers, including Chrome, Firefox, Brave, and Microsoft Edge. It also has a mobile app for Android and iOS devices.
Non-custodial Wallet: What This Means
As a non-custodial wallet, the private key, or secret recovery phase, is held by the user and MetaMask has no access to it.
While MetaMask offers high security and protection, users could lose all their funds if they engage in improper security practices, such as giving allowance to malicious smart contracts and getting their private key stolen by an untrusted third party.
A Brief History of MetaMask
MetaMask was founded in 2016 by blockchain developers Aaron Davis and Dan Finlay from the leading Ethereum software company ConsenSys.
ConsenSys is a blockchain company building Ethereum-based infrastructure and applications to create more efficient and secure economic systems. It was founded by Joe Lubin, who co-founded Ethereum alongside Vitalik Buterin.
Before 2019, MetaMask was only available as a desktop browser extension for Chrome and Firefox, with less than 300,000 users. The lack of an official mobile app resulted in several instances of malicious software posing as MetaMask, thus slowing down the wallet’s adoption rate.
The mobile app was officially launched for iOS and Android in September 2020. The release of the mobile version of the MetaMask wallet played a crucial role in rapidly bringing in new users from the global markets, together with the NFT boom of 2021. With its numerous features, MetaMask has since been a central catalyst pushing dApps adoption in the crypto industry.
Features of MetaMask
Sending, Receiving, Swapping, and Storing Tokens
MetaMask offers a sleek and intuitive interface, making it easier for users to navigate the wallet. The setup process for the MetaMask wallet is also straightforward, even for beginners. Once the wallet is created, users can use it to send, receive, and store ETH and other ERC-20 tokens and NFTs.
Supports Multiple Blockchain Networks
While MetaMask was developed to boost access to the Ethereum ecosystem, the wallet offers access to multiple other blockchain networks. However, these other blockchain networks must be compatible with the Ethereum Virtual Machine (EVM).
The EVM is often called the heart of the Ethereum ecosystem, and the program autonomously creates and executes smart contracts on the Ethereum network.
MetaMask supports numerous EVM-compatible blockchains, including Polygon, BNB Chain, Avalanche, Fantom, and Boba. Users and developers can access all these networks via the wallet. However, users must manually add or enter their preferred network on MetaMask, as the Ethereum mainnet is the default network on the platform.
Token Swap
MetaMask has an in-built swap feature that allows users to swap tokens on Ethereum, BNB Chain, and Avalanche C-Chain, without leaving the wallet’s app. This feature helps to reduce friction, lower costs, and limit slippage.
The MetaMask Swap aggregates exchange rates from multiple DEXs and Automated Market Makers (AMMs) to find the best rates. MetaMask users can access the liquidity pools of some of the biggest DEXs and AMMs in the market, including Uniswap, 1inch, ParaSwap, and Curve. MetMask charges a fee of 0.875% of the transaction amount, which is used to fund the platform’s development.
Multiple Accounts
MetaMask allows users to create multiple accounts or wallets. When users create a new wallet, the platform generates a new public address; however, this address is generated under the same private key.
Users can easily switch between their multiple accounts with a single click, this is also useful from privacy reasons.
Portfolio Tracking
MetaMask recently launched this feature to allow users to track their tokens and NFTs across accounts and networks. This feature is currently in beta and can be accessed via portfolio.metamask.io.
Integration with Hardware Wallets
MetaMask offers users an extra layer of security by allowing seamless integrations with hardware wallets, such as Trezor and Ledger. By linking the MetaMask wallet to these hardware wallets, users increase the security of their assets, as this means that the account can’t send or sign transactions without the approval of the hardware wallet.
A Central Hub for dApps and Web3
MetaMask offers a gateway into the world of dApps and DeFi, with a mission to create an interconnected and interoperable Web3 ecosystem. The wallet connects users to EVM-based dApps, gaming platforms, crypto lending products, NFT projects, and more.
MetaMask also has a bridge that allows users to transfer assets between six networks – Ethereum, BNB Chain, Gnosis, Optimism, and Arbitrum. Users can access this feature via – bridge.connext.network.
Privacy and Pseudonymity
One of the reasons MetaMask is popular in the DeFi and dApp sectors is its privacy and pseudonymity features. Users can download, install, and use the MetaMask wallet without disclosing sensitive personal information.
Since the wallet does not keep users’ personal information, the accounts are protected by high encryption systems, making it almost impossible for a third party to access users’ funds without authorization.
Additionally, while transactions conducted by users are public, linking them back to the wallet owner is difficult as there is no personal info on the account.
Customizable Fees
MetaMask allows users to input the gas fee they are willing to pay for their transactions. This option lets users determine their gas fees based on how fast they want their transactions processed.
This feature is because Ethereum miners are more eager to process transactions with higher fees. Therefore, to avoid waiting longer for transactions to be processed, MetaMask users can pay additional fees for faster processing.
HD Wallet Integration
MetaMask has a hierarchical deterministic (HD) feature that helps users back up their accounts. Thus, with the HD wallet integration, users do not have to worry about backing up each public and private key. Instead, they rely on the single secret recovery seed phrase, a 12-word phrase.
The seed phrase can be used to reset lost account information. However, losing the seed phrase and losing access to your Metamask and/or your Metamask password can result in no access to your funds.
Getting Started With MetaMask: How to Install
MetaMask offers a smooth onboarding process suitable for users of all experience levels. Below is a detailed step-by-step guide on how to get started with MetaMask on both the desktop browser and mobile app versions.
MetaMask’s Extension for Desktop
To use MetaMask on your desktop, you’ll need one of the supported browsers – Google Chrome, Firefox, Brave, Microsoft Edge, and Opera. We used Chrome in this section, but the setup process is almost identical regardless of the browser you choose to use.
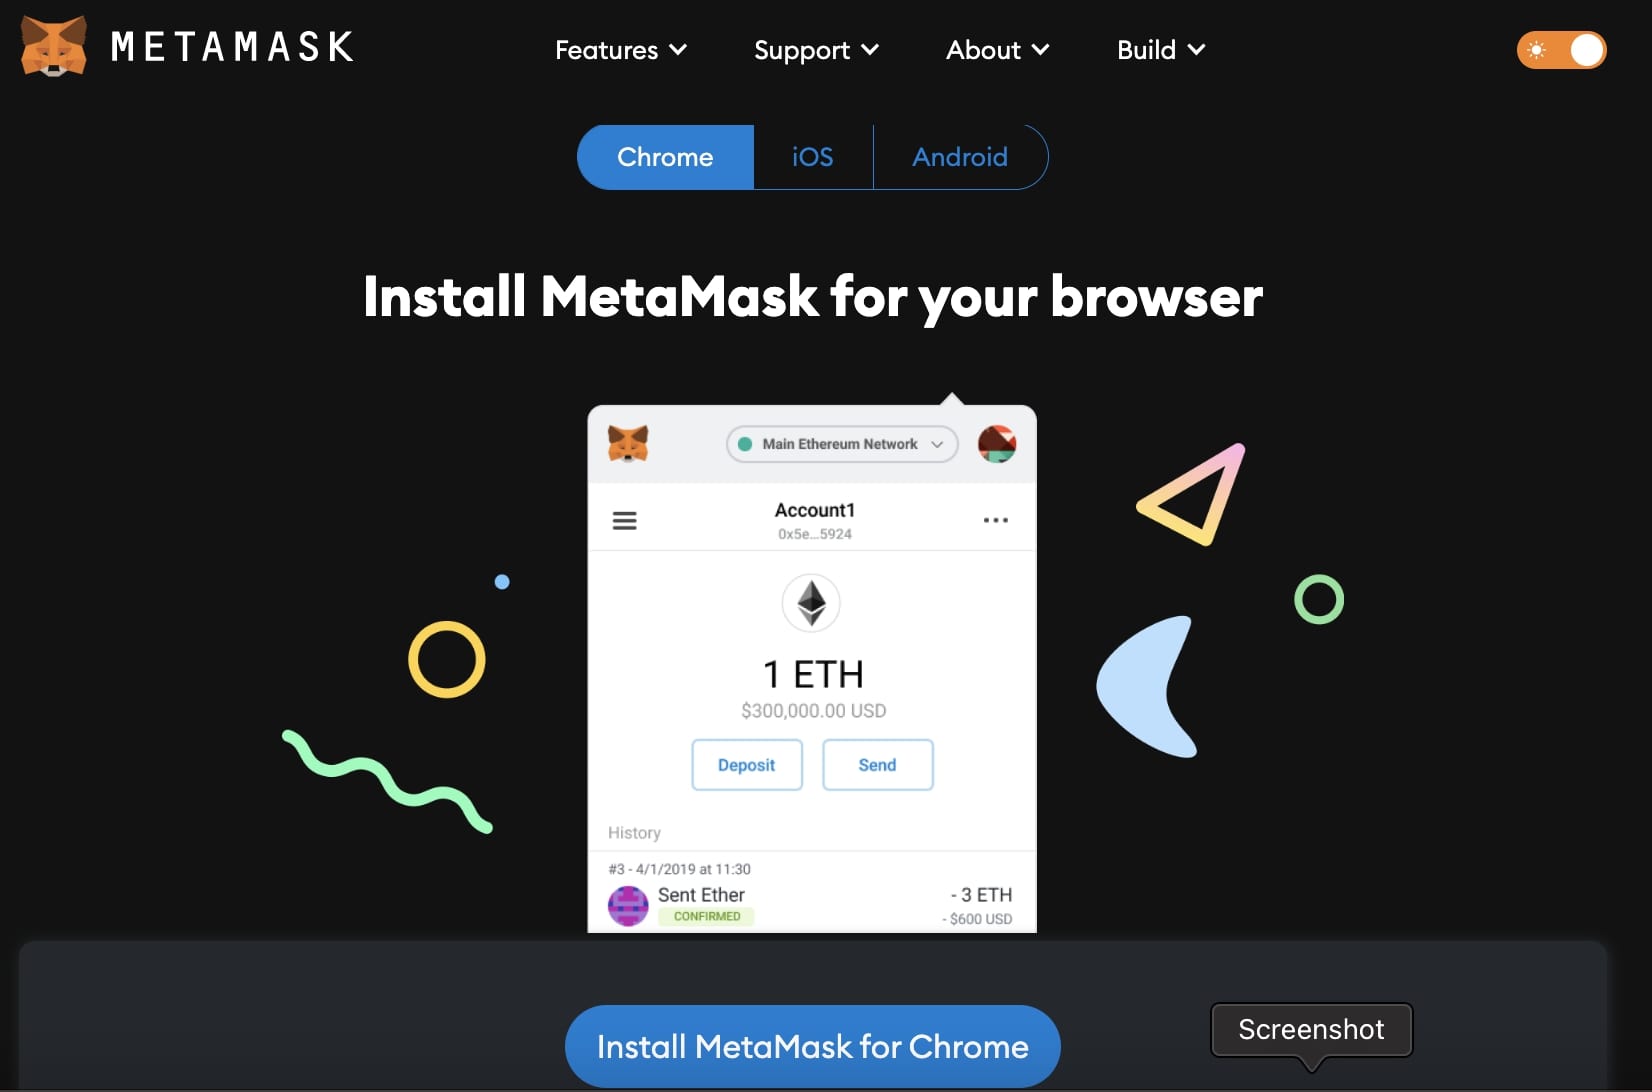
- Step 1: Install MetaMask Chrome Extension
Go to the official MetaMask website, click download, and then install MetaMask for Chrome.
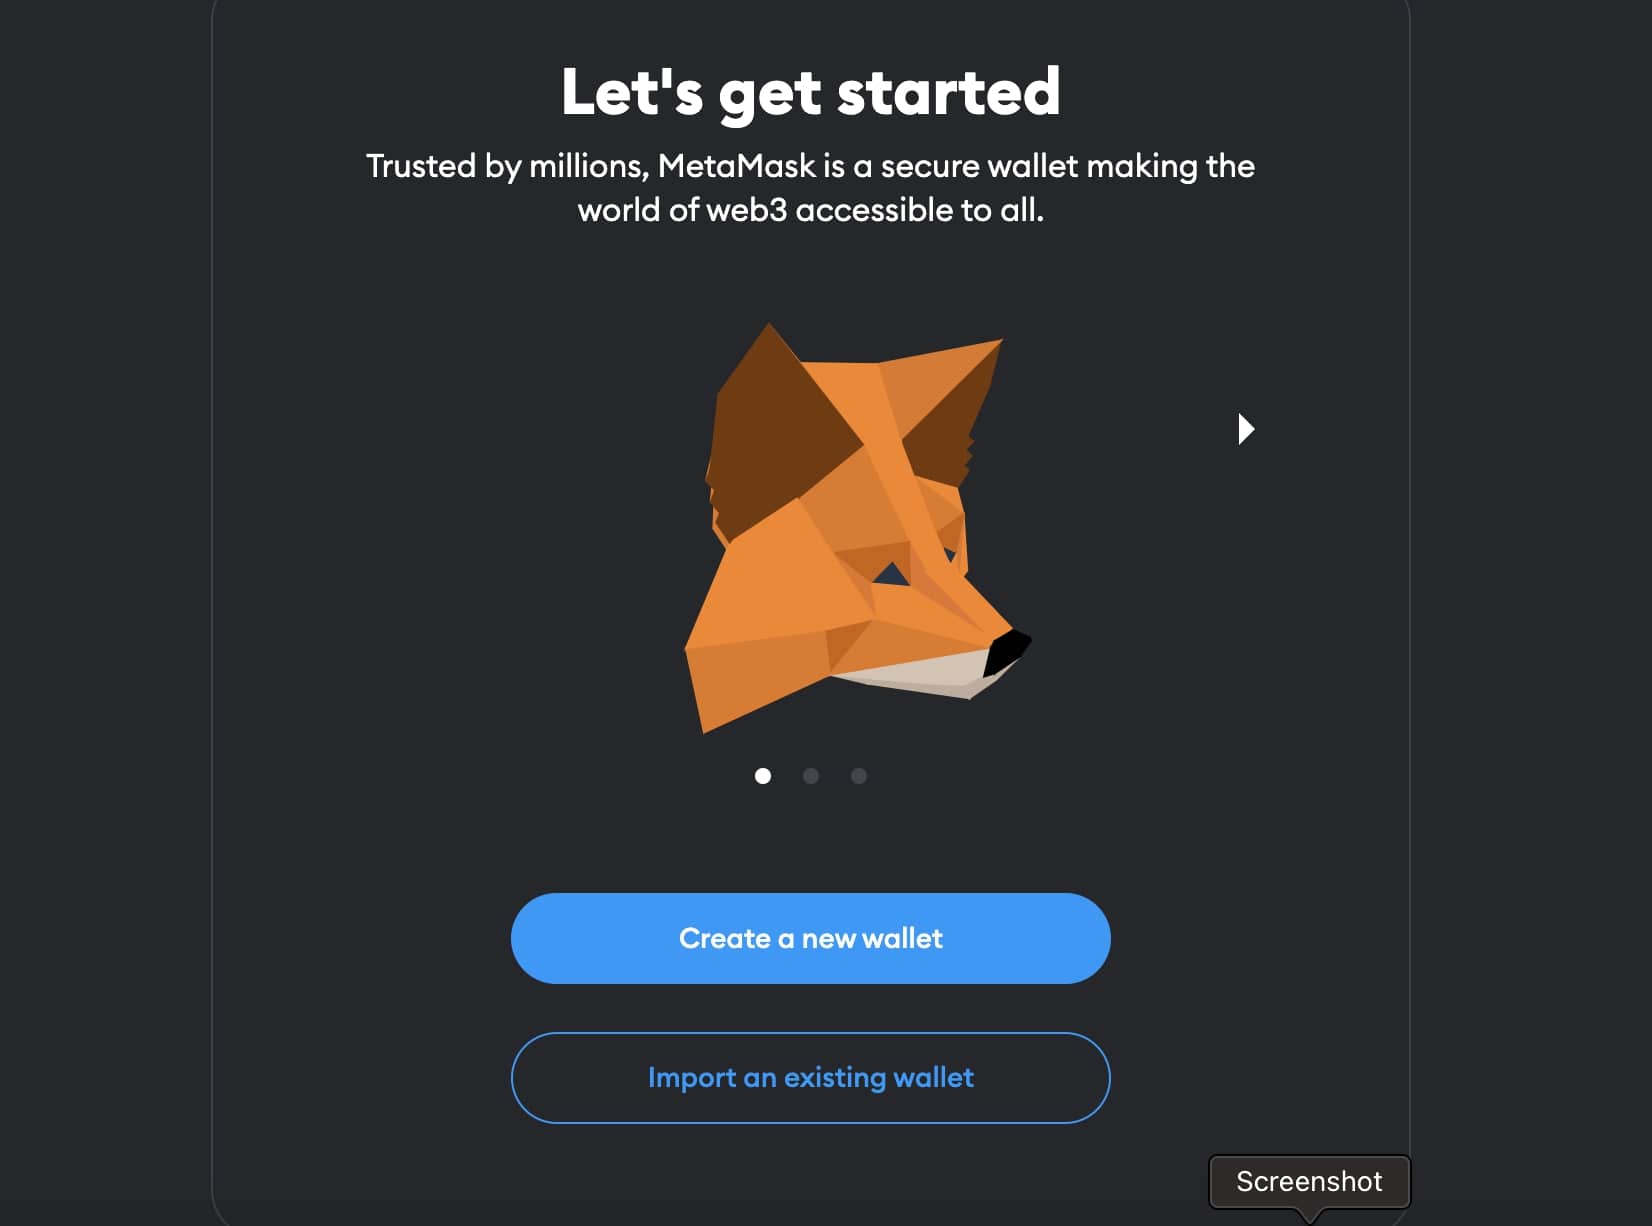
- Step 2: Create a New Wallet
After successfully installing your MetaMask Chrome extension, click “Create a New Wallet.” You can also import your MetaMask wallet if you already have a non-custodial wallet you’d like to transfer to MetaMask.
- Step 3: Improve MetaMask
Once you click “Create a New Wallet,” you will be automatically asked if you want to help “Improve MetaMask.” But providing data to Metamask. You can either accept or reject this prompt.
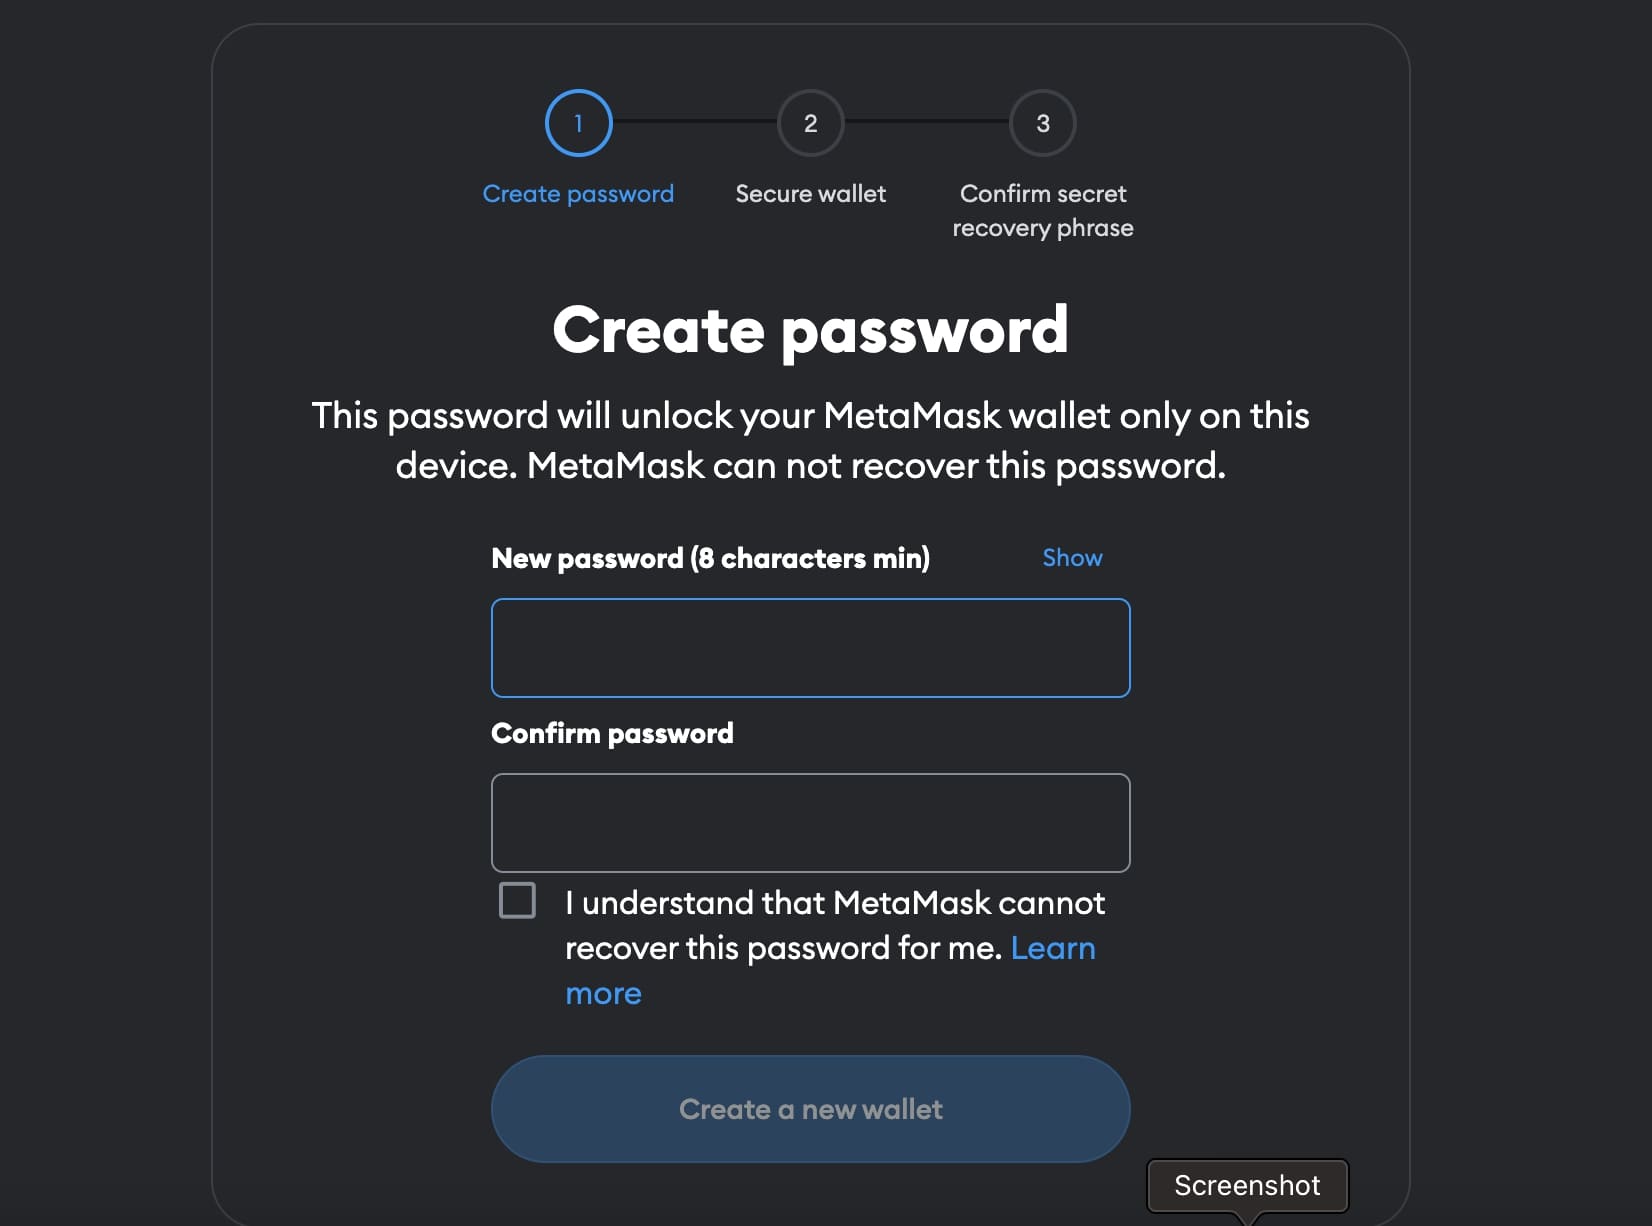
- Step 4: Create a Password
This step requires creating a strong password with at least eight characters of upper and lower-case letters, numbers, and symbols. Using a new password is best to prevent someone with access to your device from easily guessing it. Confirm your password and click on “create a new wallet.”
Remember: This password only protects your device’s Metamask. However, if someone gains access to your secret recovery phase, then he or she can gain complete control over your funds.
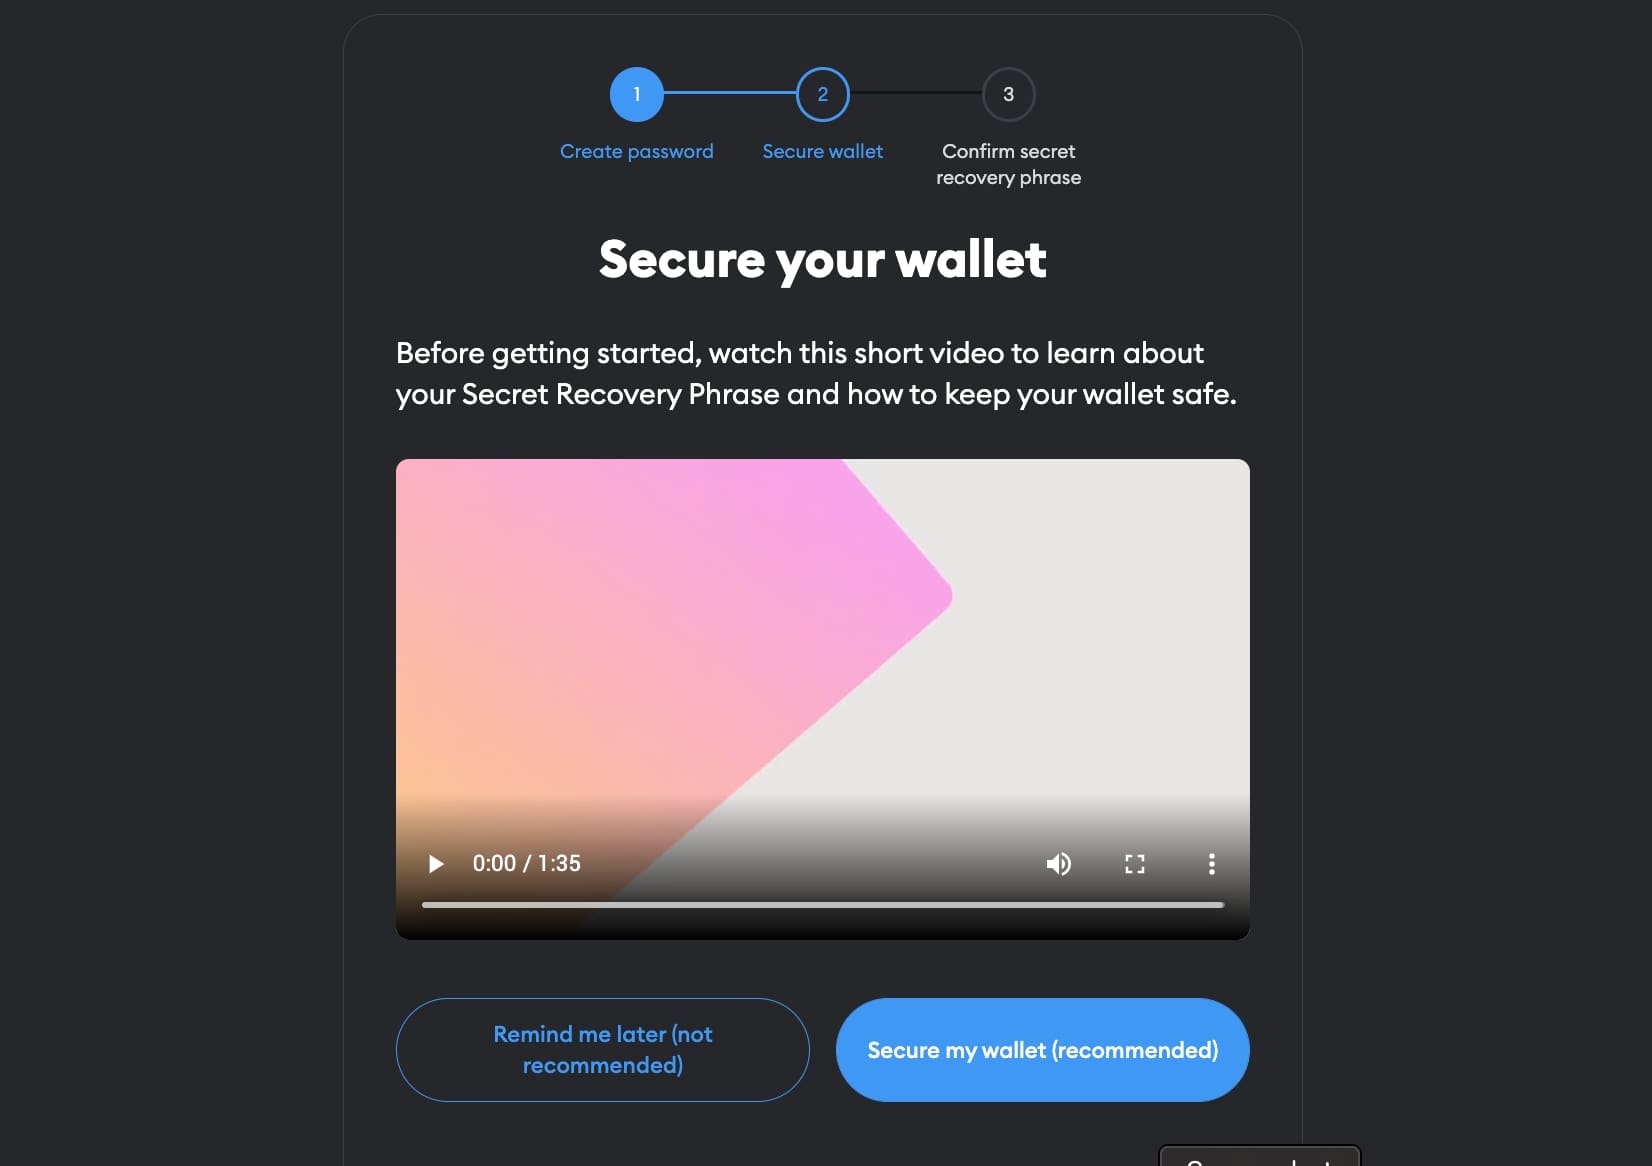
- Step 5: Back Up Your Seed Phrase
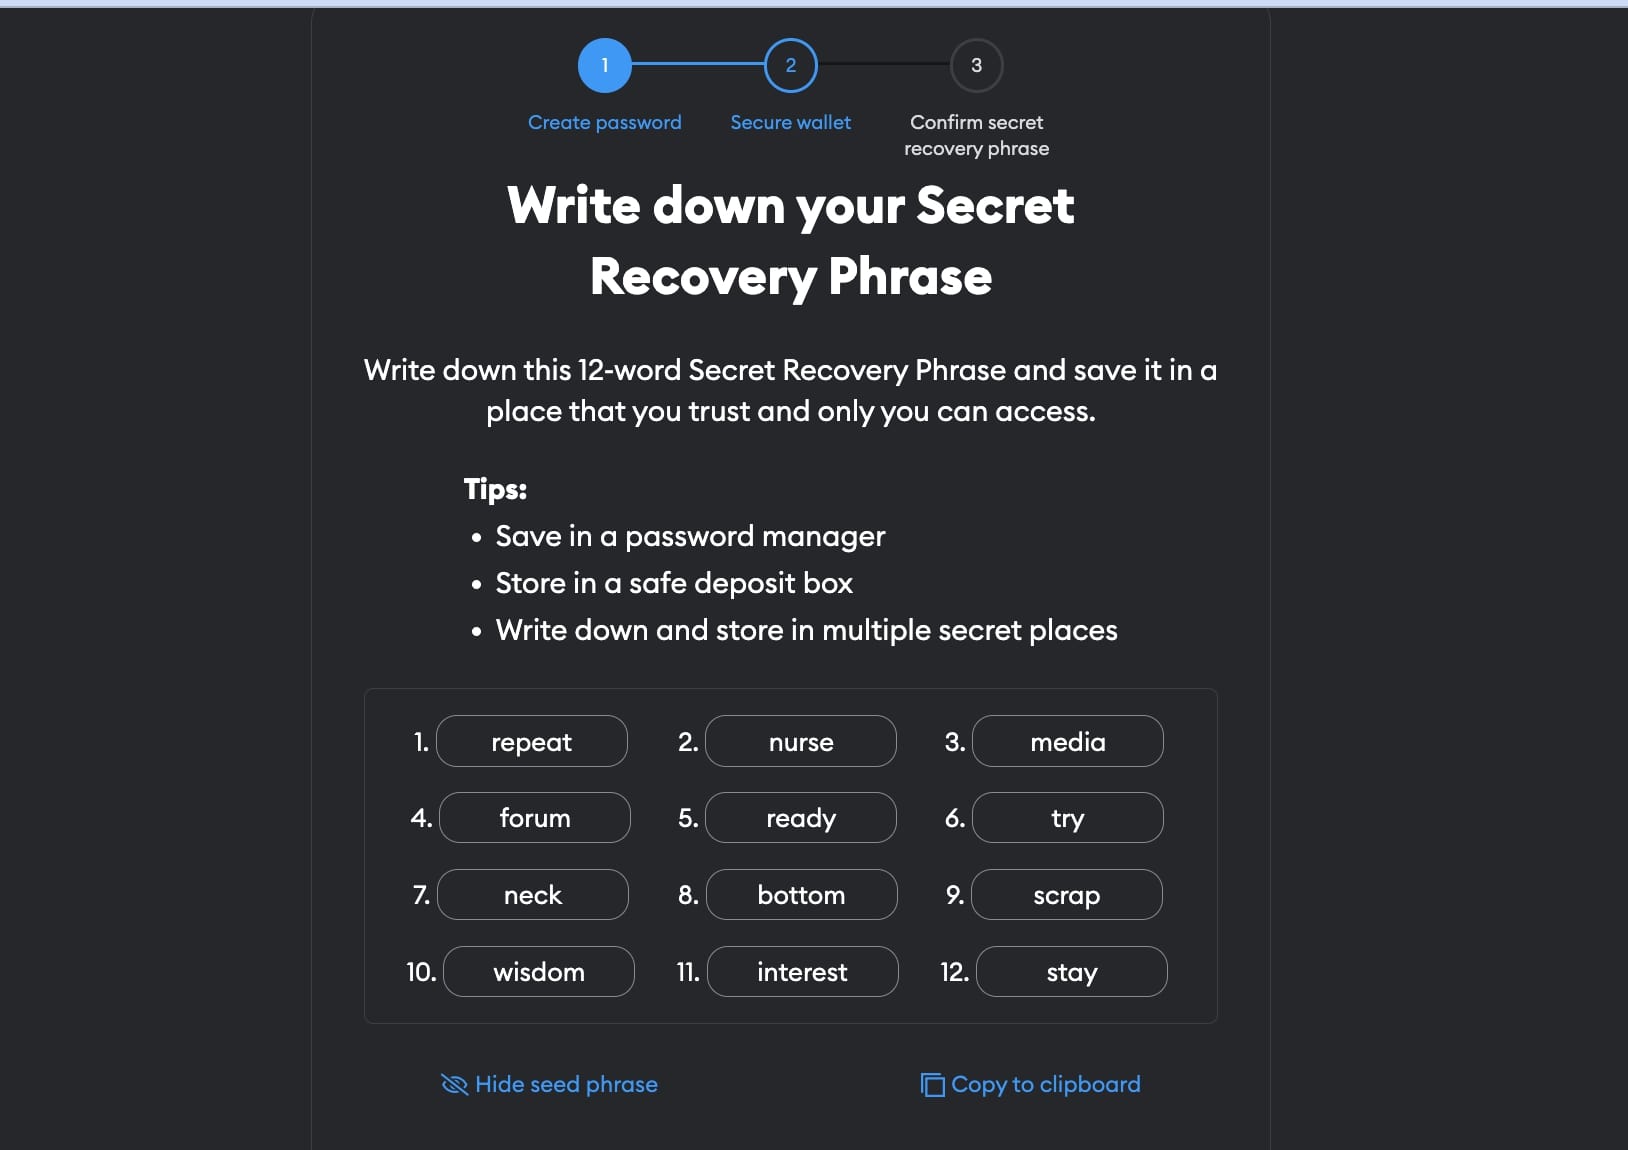
Next, MetaMask will provide a 12-word secret recovery seed phrase. This phrase allows you to recover your account if you lose your device or want to move the wallet to a new device, so it’s advisable to write them down and store them safely.
- Step 6: Confirm Your Seed Phrase
Once you have written down the seed phrase, the next button will take you to the confirmation page. Here, you need to enter the phrase in the same order as it was presented in the previous step.
MetaMask makes this process easier by providing some of the 12 words and leaving just three spaces for you to fill in. Still, you must be careful. After filling in the blanks, hit “Confirm” to create your wallet.
The following is a screenshot of a seed phrase creation. Remember: never expose your seed phrase or part of it to anyone.
- Step 7: Configure Settings
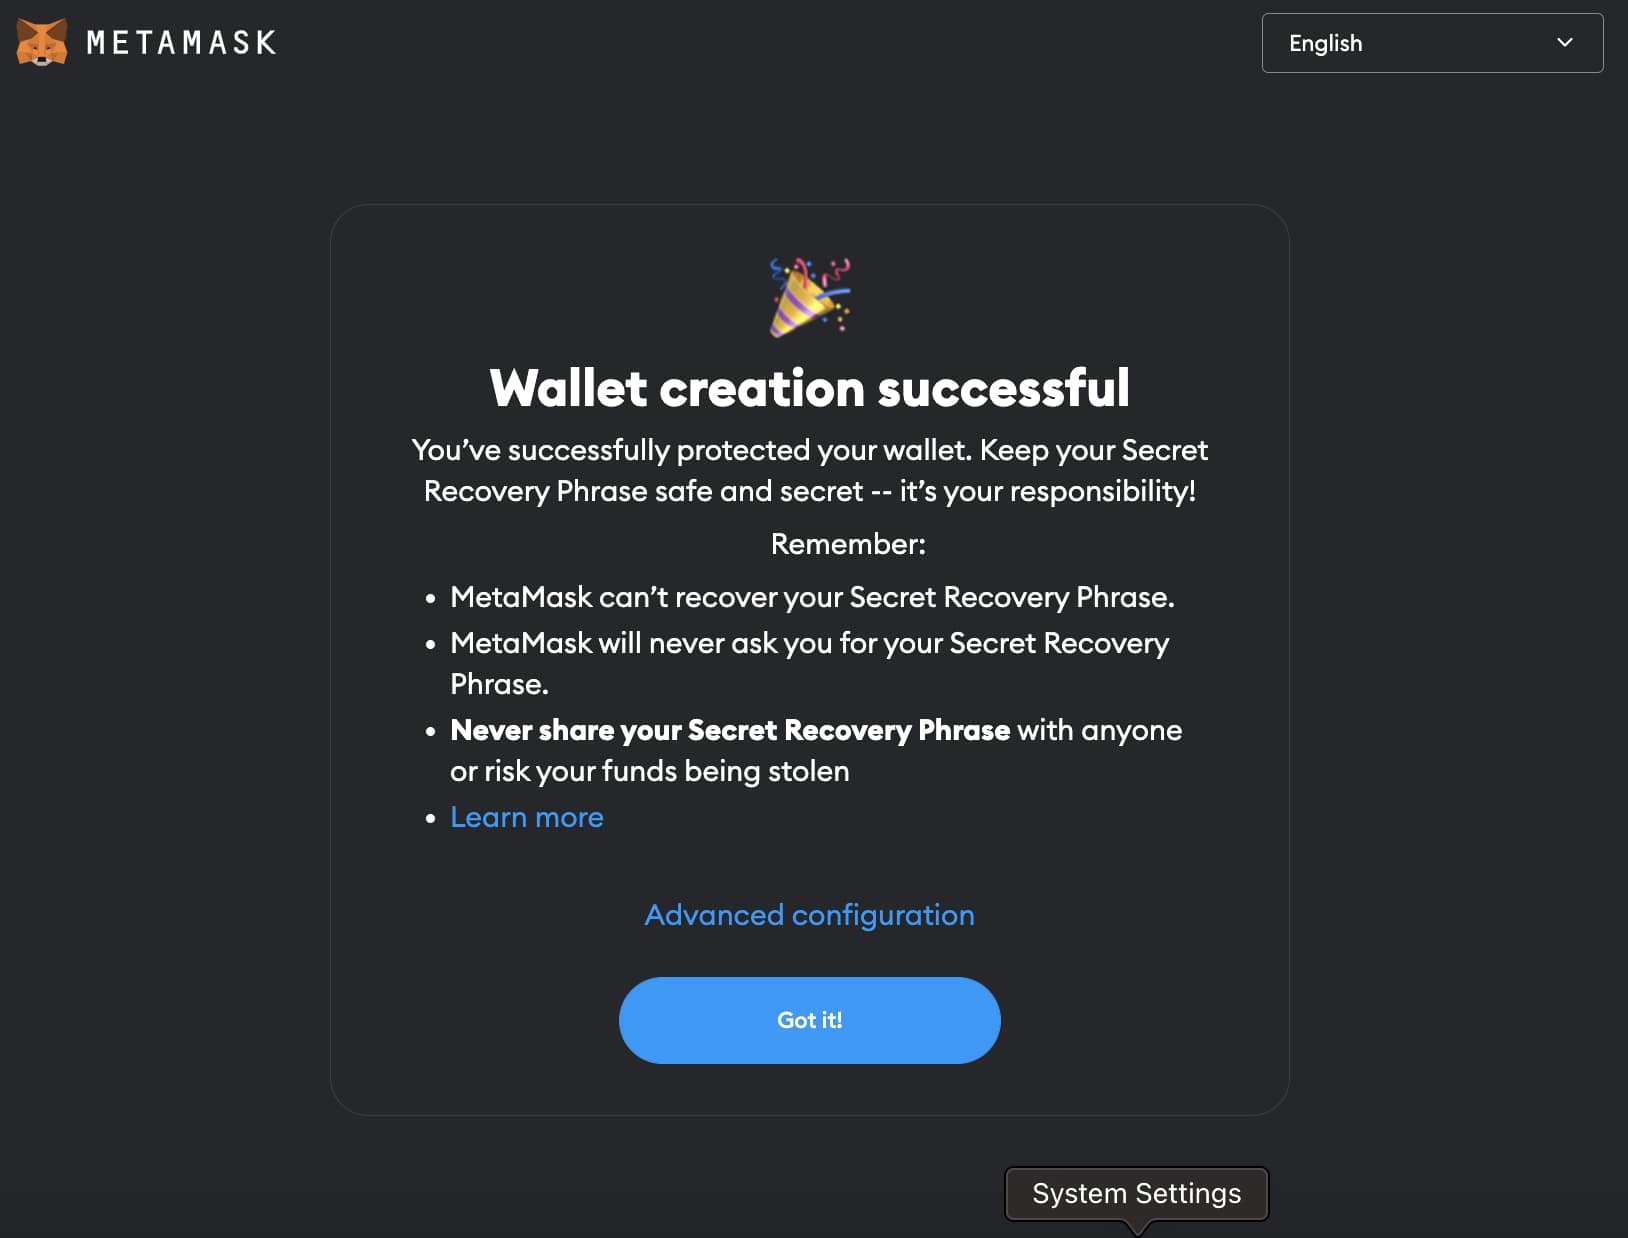
After a successful confirmation, the next page allows you to configure your settings. While this is optional, it lets you familiarize yourself with MetaMask’s settings, and the different menus can be a big help if you ever have any problems.
MetaMask also reiterates its warnings about the safekeeping of your seed phrase. Click “Got it” to log in to your wallet.
- Step 8: You’re All Set
Once you have completed the setup process, you will be automatically logged into your MetaMask wallet. You can now send, receive, and store cryptocurrencies.
You can also interact with numerous dApps, DEXs, NFT marketplaces, and more.
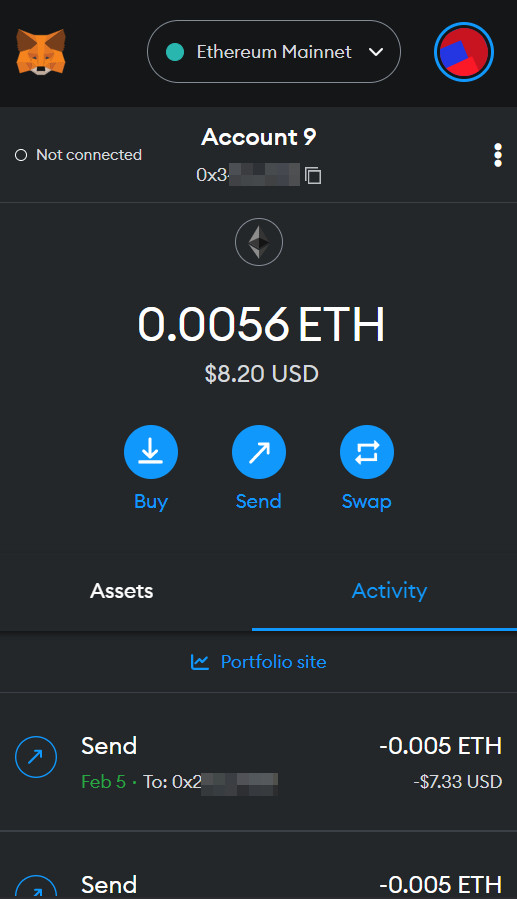
The Metamask Main Screen: Your Balance
Once you’ve installed your wallet, you will then see your ETH balance. Below it you will see three buttons: “Buy” option that will redirect you to buying crypto with FIAT via services like Coinbase Pay and MoonPay, “Send” that is used to send tokens, and “Swap” which is the internal tool on Metamask to exchange between crypto tokens, i.e. you can buy USDT with your ETH, and vice versa.
On the lower part of the extension, you can see “Assets” which displays the tokens you’re currently holding and also your recent activity.
Sending and Receiving Tokens Using Metamask
To receive ETH or ERC-20 tokens to your wallet, you will need to send your public key, which is your wallet address – a string starts with “0x” and can be easily copied by clicking on the button below the Account title on your main display.
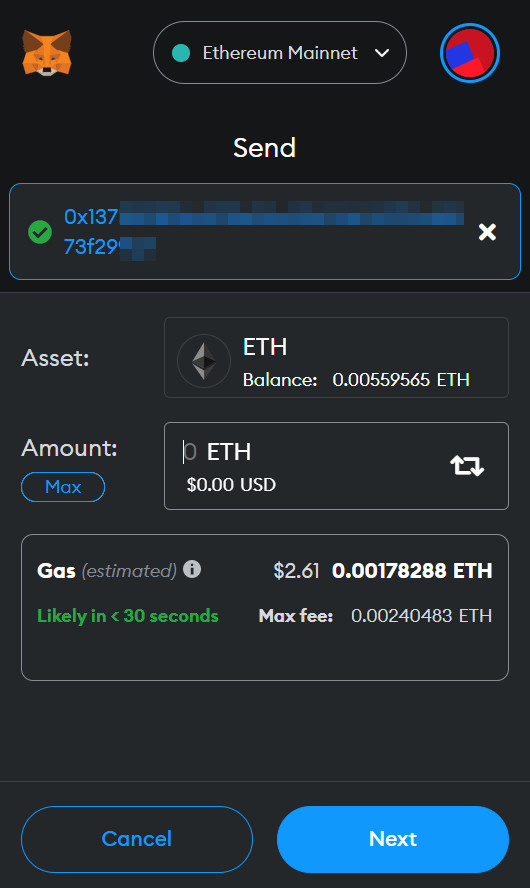
Sending tokens is pretty straightforward: All you need to do is to click the “Send” button, then, paste the address you want to send funds to, on the next screen, you will be able to choose which asset you want to send and its amount.
Let Metamask estimate the gas for you, and click “Next.” The following screen will be a recap of your transaction and you will then have to click “Confirm” (or Reject if changes need to be made).
How to Add Other EVM Networks
Ethereum is the default network on MetaMask, so if you’d like to use other networks, you have to add them manually. You can do this with a few clicks for popular networks such as BNB Chain and Polygon.
To do this, click “Ethereum Network” at the top right of the MetaMask wallet, then click “Add Network.” This will redirect you to a list of available networks. Find your preferred network and click “Add.”
If your preferred network is not on the list, you can add it manually by clicking “add a network manually” and entering the network’s details.
Important: Always make sure you’re double-checking the source of information, and be suspicious if your network is not showing on the default list of Metamask. Interacting with unknown networks can result in a loss of funds.
MetaMask App on Mobile
The mobile version of the MetaMask wallet provides the same functionalities as the desktop browser-based extensions.
The mobile version has a sleek interface and is easy to navigate. The MetaMask mobile app has all the functionality available on the browser version, including buying, selling, sending, and receiving tokens. It also offers secure logins, including fingerprint authentication and key vaults, and allows users to explore a wide selection of Ethereum-based dApps using the dApp browser.
To use MetaMask on Android or iOS, download the verified mobile application on either the Google Play Store for Android or App Store for iOS. Important: Ensure you’re downloading the verified version as scam apps pretend to be the Metamask app, and aim at stealing your funds.
The setup process is identical to that of the browser extension.
Then, you can also sync your MetaMask mobile wallet with the browser extension. To do this, you just need to log in to your MetaMask browser wallet, then go to “Advanced” on the settings menu and click “Sync with Mobile.” Scan the QR code with your mobile device and link the accounts.
MetaMask & Security: Best Practices
When using MetaMask, users must follow some security best practices to ensure optimal security.
Never Share Your Seed Phrase With Anyone
This and the next tip are also true for all other wallets.
Anyone with access to your secret recovery phrase can gain complete control of your funds. Scammers often pose as Metamask support to deceive unsuspecting users into disclosing their seed phrases. Don’t fall for it.
Never Back Up Your Private Keys on Your Device or Online
Keeping a digital copy of your seed phrase –local on your PC or online on your cloud – is a big no-no when securing your crypto wallets. If anyone gains access to it, they can and will likely transfer all the assets in your wallet by importing the seed to another device and gaining full access to your funds.
The best way to secure your seed phrase is to keep it offline, write it down and store it somewhere safe. Preferably in two places and divided into two halves (instead of storing 12 words together).
Don’t Click on Random Links
Never click on random Google Ads and unauthorized links, as hackers can easily exploit your wallet. If you want to install the MetaMask wallet, it is advisable to download it from the official website, to avoid falling victim to phishing attacks.
Additionally, while MetaMask allows access to multiple dApps, it is crucial that you only interact with known protocols.
Use Secure Devices
Always ensure that you are logging into your MetaMask wallet on a secure device. Hackers can gain access to your MetaMask wallet using malware.
Regularly Check Approvals and Use Revoke Access
You can set smart contract approvals to allow dApps to access and move tokens from your wallet on your behalf. However, enabling this approval for multiple dApps makes you vulnerable to hacks. Therefore, you can use the “approval checker” to keep track of your existing approvals and easily revoke the ones you no longer need.
Integrate a Hardware Wallet to your Metamask
MetaMask is considered a hot wallet, unless integrated with cold HD wallet such as Trezor or Ledger. Hot wallets are less secure than cold wallets, which offer offline storage, since their private key creation occurs offline.
Therefore, it is best to integrate a hardware wallet into your MetaMask wallet. Keep day-to-day funds in the hot wallet while keeping other valuable crypto assets in your cold wallet.
Update Your Device and Browser Regularly
Always keep your device up to date. Chrome occasionally has critical security updates, as do iOS and Android devices. When you see the red Update button flashing on your broswer – always install the new update.
Conclusion
MetaMask offers decent functionality as a bridge into the Ethereum ecosystem. With its easy-to-set-up and use features, numerous customization options, and access to multiple blockchains and dApps, it is not surprising that MetaMask is the most popular non-custodial crypto wallet.
Since its launch, MetaMask has served as a seamless access point for the rapidly growing dApp and DeFi sectors. The wallet’s usability will continue to be evident as the digital asset industry progresses to mainstream adoption.
Additionally, with the increasing failure of centralized systems, using a non-custodial wallet like MetaMask is every user’s best security choice.

